
Sunday, January 8, 2012
FLAIR FOR HOME HAS A NEW SITE!
FLAIR FOR HOME HAS MOVED! Come on over to the NEW Flair For Home. Join the site with Google Connect (right column), and, stay tuned for lots of ideas for living with FLAIR!


Friday, January 6, 2012
The NEW Flair-For-Home!!!
Hello! Happy Friday! I am VERY excited to direct you to my super new blog! My very talented friend, Elizabeth Holliday of Swanky Press Designs, has designed a really cool new look for me. Thank you Elizabeth! To launch it in true "flair" style....I am doing a FUN giveaway, starting this evening. I can't wait to get your thoughts on my new blog! Simply click here: Flair-For-Home.
Living With Flair,
Beth
Monday, January 2, 2012
Fudge & Kahlua Brownie Trifle
This recipe is a Christmas tradition in my family. You can make it any time of year and, be sure and invite your favorite friends over to 'sample' it...they will love it! This is very easy, elegant and, I promise, the trifle dish will be empty, after your guests depart.
Fudge & Kahlua Brownie Trifle
Ingredients:
1 box brownie mix, prepare per package directions
2 packages chocolate mousse mix, prepare according to package directions
1/2 package chocolate toffee pieces
3/4 cup Kahlua (coffee liquor)
1 container, whipped topping (thawed)
*Garnish with ice cream fudge topping
Prepare the brownies and allow to cool in the pan. Once cooled, cut up into 1-inch cubes. Prepare the chocolate mousse mix. Place one half of the brownie cubes in the trifle dish. Pour 1/3 cup of Kahlua over the brownies. Layer one half of the chocolate mousse on top of the brownies. Repeat this process and, then, top with whipped topping, toffee pieces and drizzle with fudge ice cream topping. Chill for 4 hours or, can be made the night before and chilled overnight. Serve cold. *This is SO good!!!
Here is the mousse mix that I used...very good!

Mixing up the mousse...doesn't this look so creamy and good? Well, it is!!!

Adding the kahlua really makes this dessert so good...

Layer the brownies, (drizzled with kahlua) and the chocolate mousse, then repeat.


Super easy...drizzle chocolate ice cream topping over the whipped topping and, you are done!

So delicious looking...refrigerate for 4 hours and, you are ready to grab a bowl and a spoon and, dig in!


I hope you will prepare this easy and delicious dessert really soon! Happy new year and, happy cooking!!!
Living With Flair,
Beth
Sunday, January 1, 2012
Easy Mexican Cream Cheese Appetizer
Happy New Year to each of you! I absolutely adore a brand new year! A time to reflect on this past year, with all its many blessings (and ups and downs), a time to set new goals and strive to better myself as a wife, mom and, keeper of our home. How exciting!
We celebrated at our home last night with two wonderful couples and, their children. My good friend, Jason Holbrook fried up his amazing Buffalo Wings...sorry, the recipe is "top secret". TOO good! I prepared this really easy Mexican Cream Cheese Appetizer. Feel free to make it and share it with anyone you wish, I created it, and, my sweet husband (my best food critic!) gave it a double thumbs up!
Mexican Cream Cheese Appetizer
Ingredients:
2 pounds ground beef, browned and grease drained
1 packet taco seasoning
2 packages cream cheese, softened and cubed
1/2 container white cheese dip
2 t. Cajun seasoning
1 t. salt
1 t. garlic powder
1 can whole kernel corn, drained
1 can black beans, drained
1 can Ro-tel chopped tomatoes w/ green chilies
2 1/2 cups Cheddar/Monterey Jack Cheese blend, grated
Directions: In a large skillet, brown ground beef with taco seasoning and then, drain off grease. Stir cream cheese into the beef, over medium heat. Stir in the white cheese, until blended. Remove mixture from heat. Add Cajun seasoning, salt and garlic powder, mix well. Add corn, black beans, and chopped tomatoes. Mix all together. Place mixture in a glass baking dish and, top with the cheese. Bake at 350 degrees for 30 minutes. Serve hot with dipping size Fritos.
Very easy to keep these ingredients on hand, for a last minute appetizer:

Happy New Year! Hats and confetti poppers...set out, all ready for our guests.


Of course, we had to have blowers!

Brown the meat with taco seasoning.

Add cream cheese to the meat mixture. Continue to stir over medium heat until the cream cheese melts.

White cheese dip: add half the container to the meat mixture and stir over medium heat until blended.

Sweet girls, ready to ring in the new year! Watching Mama cook...

Add the corn and black beans. Pretty color!

Add the chopped tomatoes.

Place the mixture in a glass casserole dish and top with grated cheese. Bake at 350 degrees for 30 minutes. Serve hot with big dip size Fritos.


Remove from oven and, serve it up. I added a little more cheese to the top, before serving. Can you ever have too much cheese? HA!!!!


Wishing each of you a FABULOUS new year! Happy 2012! Let's live this new year with lots of FLAIR!!!
Hugs to All,
Beth
Linking To:
Weekend Bloggy Reading
Crafts Keep Me Sane
Tip Junkie
I {Heart} Naptime
Home Stories A to Z
Monday, December 26, 2011
New Year's Eve Kit
Hello! I am so excited to share this really cute idea with you all! A New Year's Kit. Some sweet friends surprised us with this darling present last week! I can't remember the last time I have seen a more creative and thoughtful gift...LOVE THIS!!! The most creative part? We received this BEFORE Christmas, so...it was just in time for our New Year's Eve celebration, but, a fun and unexpected surprise, since we were totally in the "Christmas" mindset.
A pretty package, ready to open...

LOVE this printed label...Cute!

Look at this adorable stuff!

New Year's Eve hats!

Little party poppers...all packaged.

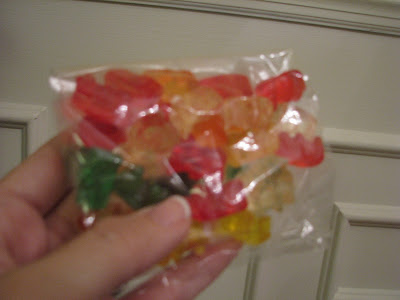
Gummy bear packs for our children...too fun!!!
More cute printed labels to continue the theme...

Plates and napkins...

Sparkling cider for the children and champagne for Mom & Dad...love it!!!

A New Year's Banner...all sparkly!

Here are the contents of the gift bag all set out for you to see...


What a thoughtful gift!!! Our wedding anniversary is January 1...will be 18 years, YAY! Our son's birthday is also January 1, and, he will be 4 years old. So thankful we now have everything we need to ring in the new year, all because of a very sweet and creative friend. I truly hope you had a wonderful Christmas!
HUGS TO EACH OF YOU!
Beth
A pretty package, ready to open...

LOVE this printed label...Cute!

Look at this adorable stuff!

New Year's Eve hats!

Little party poppers...all packaged.

Gummy bear packs for our children...too fun!!!

More cute printed labels to continue the theme...

Plates and napkins...

Sparkling cider for the children and champagne for Mom & Dad...love it!!!

A New Year's Banner...all sparkly!

Here are the contents of the gift bag all set out for you to see...


What a thoughtful gift!!! Our wedding anniversary is January 1...will be 18 years, YAY! Our son's birthday is also January 1, and, he will be 4 years old. So thankful we now have everything we need to ring in the new year, all because of a very sweet and creative friend. I truly hope you had a wonderful Christmas!
HUGS TO EACH OF YOU!
Beth
Friday, December 23, 2011
A Mother/Daughter Cookie Exchange~ Fun Times!
One of the highlights of my ChRiStMaS season has been a Mother/Daughter Cookie Exchange in our home, this past Tuesday morning. This idea is totally inspired by my good friend AMANDA BROWN, her blog (My Heart's Desire) is really great and, I hope you will check it out. Ahhhh...we really had a SWEET time! My dear friends, Aimee, Brandi, and Karen helped me host and, what a NEAT event!
We served Chic-Fil-A mini chicken biscuits.... (so easy! ...and, Yummy!)...

And, powdered sugared donut holes (I bought these at Kroger)

Chocolate Chip Ice Cream Punch for the little girls... this was a real 'hit'...plastic cups and red/white straws that I cut in half... topped off with red and white sugar sprinkles.

Mini cinnamon rolls were served up...I bought these at Kroger too...(so easy!)

I found these glass apothecary jars at Kroger (Kroger has it ALL!!!) - on their Christmas aisle. Filled two of them with marshmallows and Twizzler candies, for a festive look.


My girls...ready for the cookie exchange...

My friend (and fellow hostess), Aimee...with her girls Anna and Abigail.


The ladies really brought their "A game" with cookies and recipes to share!

The table....all ready to go and, Aimee is serving ice cream punch...

Love this! All of the women in a big circle...sharing their Christmas cookie tradition.

Brooke and I, at the cookie exchange.


Sorry for this terrible picture! This is the Chocolate Chip Ice Cream Punch! I meant to snap a picture before and, then, it was gone!!!! Here is the recipe:
1 large plastic tub of chocolate chip ice cream ( I bought Kroger brand)
1 gallon whole milk
4 Tablespoons vanilla
5 cups powdered sugar
Mix all ingredients together in a large punch bowl and serve cold. * Leave ice cream out to thaw for 30+ plus minutes before adding to the punch. (the softened ice cream will be easier to stir). ENJOY! =)

The invitation to our party...this cute paper was on sale at Hobby Lobby.

Mercury glass Christmas tree is from the Pottery Barn Outlet here in Memphis. The apothecary jar is from Kroger.


I mentioned this before, but, cut red & white straws in half to serve with the ice cream punch...a fun little touch!

Dollar Tree party favors! These favors were my favorite part of the party! Only $1 each at the Dollar tree! I bought every one on their shelf! We made these favors up so easily! A little white card was attached to each spatula (with 2-sided tape) and then, a little ribbon tied in a knot...

The favors were stacked neatly in this silver punch bowl...set out by the front door, as our guests went to leave. FUN!!!!


I hope you will think about hosting a FUN Mother/Daughter Cookie exchange for next Christmas ....2012. This was an Awesome event and, I really believe that everyone left with a lot of holiday joy in their hearts. SO great!!!
Merry, Merry You All!!!
Hugs & Flair,
Beth
Linking To:

We served Chic-Fil-A mini chicken biscuits.... (so easy! ...and, Yummy!)...

And, powdered sugared donut holes (I bought these at Kroger)

Chocolate Chip Ice Cream Punch for the little girls... this was a real 'hit'...plastic cups and red/white straws that I cut in half... topped off with red and white sugar sprinkles.

Mini cinnamon rolls were served up...I bought these at Kroger too...(so easy!)

I found these glass apothecary jars at Kroger (Kroger has it ALL!!!) - on their Christmas aisle. Filled two of them with marshmallows and Twizzler candies, for a festive look.

Pixie Sticks for the girls ....

My girls...ready for the cookie exchange...

My friend (and fellow hostess), Aimee...with her girls Anna and Abigail.

My dear friends, Tona and Brandi. LOVE these women!!!

The ladies really brought their "A game" with cookies and recipes to share!

The table....all ready to go and, Aimee is serving ice cream punch...

Love this! All of the women in a big circle...sharing their Christmas cookie tradition.

Brooke and I, at the cookie exchange.

My sweet friend Amy, and her daughter, Lainey.

Sorry for this terrible picture! This is the Chocolate Chip Ice Cream Punch! I meant to snap a picture before and, then, it was gone!!!! Here is the recipe:
1 large plastic tub of chocolate chip ice cream ( I bought Kroger brand)
1 gallon whole milk
4 Tablespoons vanilla
5 cups powdered sugar
Mix all ingredients together in a large punch bowl and serve cold. * Leave ice cream out to thaw for 30+ plus minutes before adding to the punch. (the softened ice cream will be easier to stir). ENJOY! =)

The invitation to our party...this cute paper was on sale at Hobby Lobby.

Mercury glass Christmas tree is from the Pottery Barn Outlet here in Memphis. The apothecary jar is from Kroger.


I mentioned this before, but, cut red & white straws in half to serve with the ice cream punch...a fun little touch!

Dollar Tree party favors! These favors were my favorite part of the party! Only $1 each at the Dollar tree! I bought every one on their shelf! We made these favors up so easily! A little white card was attached to each spatula (with 2-sided tape) and then, a little ribbon tied in a knot...

The favors were stacked neatly in this silver punch bowl...set out by the front door, as our guests went to leave. FUN!!!!


I hope you will think about hosting a FUN Mother/Daughter Cookie exchange for next Christmas ....2012. This was an Awesome event and, I really believe that everyone left with a lot of holiday joy in their hearts. SO great!!!
Merry, Merry You All!!!
Hugs & Flair,
Beth
Linking To:
Subscribe to:
Posts (Atom)